Instalación de host vmware esxi 6

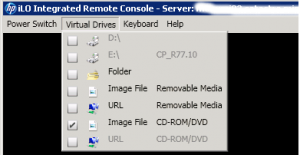
Nuestra infraestructura está montada por blades HP con ilo. A traves de la ILO, montamos la imagen de ESX.

esx6.install004

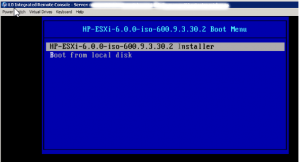
El arranque desde CD:


esx6.install005

F11 para aceptar la licencia

esx6.install002

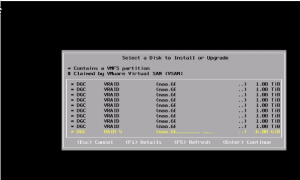
Hemos optado por unos blades sin discos, así que usamos las opciones de san-boot con una lun de 6GB para el propio sistema operativo

esx6.install006

esx6.install001

Configuración de red

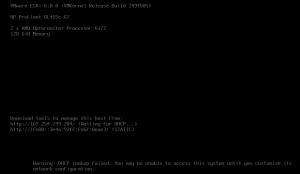
Los esxi salen con una configuración dhcp, que, si no tenemos en nuestra infraestructura, tendremos que reconfigurar a Ips estáticas

esx6.config001

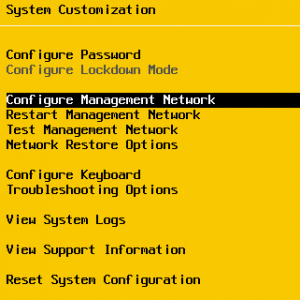
esx6.config002

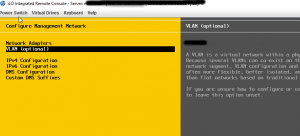
VLAN:

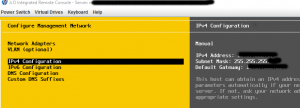
esx6.config004Ipv4

esx6.config005

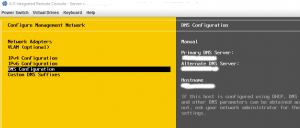
Servidores DNS

esx6.config006

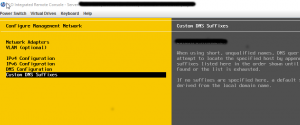
Sufijo DNS

esx6.config007

Añadir al inventario vcenter

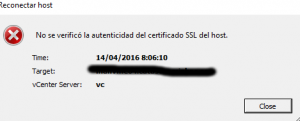
En nuestro caso, es una reinstalación de un servidor. Vamos a mantener su nombre, así que en la reconexión con el inventario, tendremos un error ssl.

esx6.config003

Stage patches

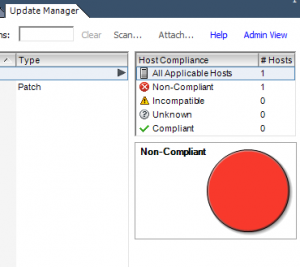
Usamos  vmware update manager

esx6.vum.001Otro reinicio…

Drivers

Últimamente, tras un cambio en cabinas, estamos teniendo muchos problemas con los drivers de los blades.

A pesar de que usamos la versión de ESX que paquetiza HP, tenemos que instalar manualmente, vía ssh los drivers:

esxcli software vib install -v  /vmfs/volumes/..../lpfc-10.5.70.0-1OEM.600.0.0.21
59203.x86_64.vib

Installation Result
   Message: The update completed successfully, but the system needs to be rebooted for the changes to be effective.
   Reboot Required: true
   VIBs Installed: EMU_bootbank_lpfc_10.5.70.0-1OEM.600.0.0.2159203
   VIBs Removed: Emulex_bootbank_lpfc_10.2.340.18-1OEM.550.0.0.1331820
   VIBs Skipped:

Host profile

Aplicamos el host profile que guarda toda la información de redes, configuraciones ntp, snmp…

Este es ya el último reinicio y el servidor está preparado para coger carga.

Vmware 6 ESXi host installation

Mount Iso image through Ilo. In this case, we are installing on a HP blade, so we are using ILO device to mount virtual CD.

esx6.install004

Boot from CD and run installer.


esx6.install005

F11 to accept license agreement

esx6.install002

Select disk to install. I our case, we use a 6 GB datastore to boot from disk. This allows us to change easily blades and keep server configuration untouched.

BTW, this blades were cheaper to buy as they have no disks.
esx6.install006

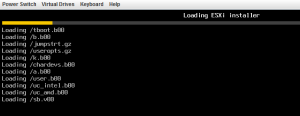
Wait for installer to end

esx6.install001

Boot.

First boot configuration

Vmware Esxi 6.0 tries to auto configure network.

esx6.config001

If DHCP is not present, static network settings have to be configured manually.

esx6.config002

VLAN:

esx6.config004Ipv4

esx6.config005

DNS server

esx6.config006

DNS suffix

esx6.config007

Add to vcenter inventory

If its a reinstallation, ssl certificates will have changes and a warning will show up.

esx6.config003

Stage patches

Using vmware update manager

esx6.vum.001This will lead to a server reboot.

Extra Drivers

For some reason, we have still to add HP drivers for our servers. Via ssh

esxcli software vib install -v  /vmfs/volumes/..../lpfc-10.5.70.0-1OEM.600.0.0.21
59203.x86_64.vib

Installation Result
   Message: The update completed successfully, but the system needs to be rebooted for the changes to be effective.
   Reboot Required: true
   VIBs Installed: EMU_bootbank_lpfc_10.5.70.0-1OEM.600.0.0.2159203
   VIBs Removed: Emulex_bootbank_lpfc_10.2.340.18-1OEM.550.0.0.1331820
   VIBs Skipped:

Apply host profile

Last reboot and host is ready to go!

Replace Github-linguist with source github version

First of all, we need to locate our github-linguist files which will be replaced. We will also need ruby-build and gcc.

find / -name languages.yml
apt-get install ruby-build gcc
ruby-build 2.1.0 /opt/gitlab/embedded/service/gem/ruby/2.1.0
cd /opt/gitlab/embedded/service/gem/ruby/2.1.0/gems/
wget https://github.com/github/linguist/archive/v4.7.5.tar.gz
tar -xvzf v4.7.5.tar.gz
mv linguist-4.7.5/ github-linguist-4.7.5
rm -f v4.7.5.tar.gz
# Install all ruby dependencies
bundle install

Generate samples.json:

After download from github,

bundle exec rake check_samples

Otherwise, we will face this error in logs

2016-03-30_07:49:38.08294 No such file or directory @ rb_sysopen - /opt/gitlab/embedded/service/gem/ruby/2.1.0/gems/github-linguist-4.7.5/lib/linguist/samples.json

Fetch all ace modes

bundle exec rake fetch_ace_modes

Problems with bundle install

gem install byebug -v '8.2.2'
mkmf.rb can't find header files for ruby at /usr/lib/ruby/include/ruby.h

Solved

apt-get install ruby-dev

When running bundle install, charlock_holmes would not be installed

gem install charlock_holmes -v '0.7.3'
(..)
checking for main() in -licui18n... no

Solved

apt-get install libicu-dev

We also had problems with rugged

gem install rugged -v '0.24.0'
(..)
checking for gmake... no
checking for cmake... no
checking for pkg-config... no
ERROR: CMake is required to build Rugged.

Solved

apt-get install cmake pkg-config
ln -s /usr/bin/make /usr/bin/gmake


Starting with R

Installation of R and R-studio in windows
  • https://cran.rediris.es/bin/windows/base/R-3.2.4revised-win.exe
  • https://download1.rstudio.org/RStudio-0.99.893.exe

Rconsole:

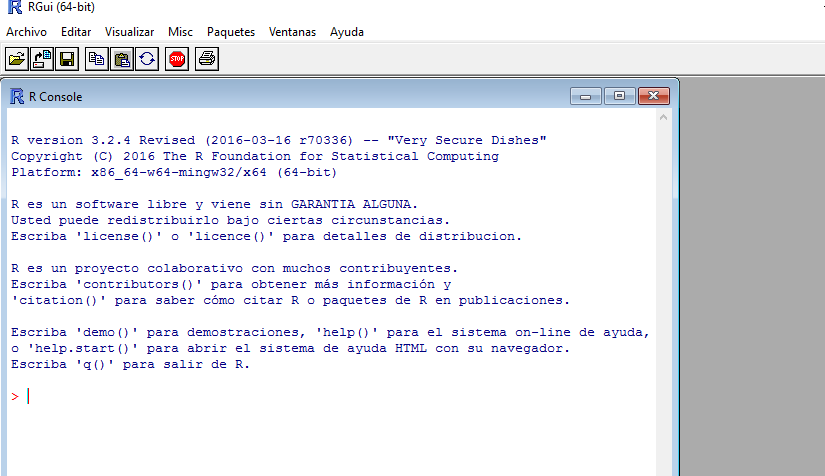
r.console.001

Proxy settings are configured at invocation command. I will use cygwin to start it:

 /cygdrive/c/Program\ Files/R/R-3.2.4revised/bin/x64/Rgui.exe  http_proxy=http:/localhost:8888/

You can also load values from internet explorer

 /cygdrive/c/Program\ Files/R/R-3.2.4revised/bin/x64/Rgui.exe  --internet2

Rconsole in linux

apt-get install r-recommended libxml2-dev  libcurl4-openssl-dev libssl-dev

wget https://download1.rstudio.org/rstudio-0.99.893-amd64.deb
sudo dpkg -i rstudio-0.99.893-amd64.deb

To Find which session file is freezing rstudio:

strace -f rstudio 2>&1 | grep open | grep home

Help. Sistema de ayuda

Online documentation for every package and function: http://www.rdocumentation.org/

help ("read.table")
?

Vignette the command used to open pdf help docs.

Installing new packages. Instalación de paquetes

To install new packages and dependencies

install.packages("curl", dependencies = TRUE)

To install more than one package at the same time, we can use C to make a vector of packages:

install.packages(c("curl","swirl","httr"), dependencies = TRUE)

Swirl package

Swirl()
Select_language()

Selección_001

Using and declaring variables.

myval <- 12

R simplest object  is a vector, it can be declared using c (combine)

myval <- c(12,21,2)

Variables value can be printed using print function or just their names:

print(myval) 
myval

To check the objects declared in a session

ls ()

Vectors

Defining a vector with a certain length and type

vector ("numeric", length = 23)

Create a vector with a repeating pattern

(rep(c(TRUE,FALSE),10))
 [1]  TRUE FALSE  TRUE FALSE  TRUE FALSE  TRUE FALSE  TRUE FALSE  TRUE FALSE  TRUE FALSE  TRUE FALSE  TRUE FALSE  TRUE
[20] FALSE

Using a vector to index another vector.Return positions that are multiple of 4:

my_vector[c(FALSE,FALSE,FALSE,TRUE)]

Dates. Fechas

Great tutorial to work with dates: http://www.stat.berkeley.edu/~s133/dates.html

today <- Sys.Date()

Load data from a file

mydata <- read.table("mycommaseparatedvaluefile.csv", header=TRUE, sep=",", fileEncoding = "latin1")
view (Data)


sdf

Introducción a R

Instalación de R y R-studio en windows
  • https://cran.rediris.es/bin/windows/base/R-3.2.4revised-win.exe
  • https://download1.rstudio.org/RStudio-0.99.893.exe


r.console.001

Para la instalación de paquetes, es necesario configurar el proxy. En el ejemplo, se redirige el proxy a un puerto local con fiddler.

 /cygdrive/c/Program\ Files/R/R-3.2.4revised/bin/x64/Rgui.exe  http_proxy=http:/localhost:8888/

También se pueden recoger los valores desde Internet Explorer.

 /cygdrive/c/Program\ Files/R/R-3.2.4revised/bin/x64/Rgui.exe  --internet2

Instalación en linux. Debian 8.

apt-get install r-recommended libxml2-dev  libcurl4-openssl-dev libssl-dev

wget https://download1.rstudio.org/rstudio-0.99.893-amd64.deb
sudo dpkg -i rstudio-0.99.893-amd64.deb

Sistema de ayuda

http://www.rdocumentation.org/

help ("read.table")
?

También existe el comando Vignette para abrir los pdfs de ayuda que vienen integrados.

Instalación de paquetes nuevos

Instalación de nuevos paquetes con dependencias:

install.packages("curl", dependencies = TRUE)

Para instalar más de un paquete al mismo tiempo, se puede usar c (Combinar) con una lista de nombres de paquetes:

install.packages(c("curl","swirl","httr"), dependencies = TRUE)

Swirl package

Swirl()
Select_language()

Selección_001

Declaración de variables.

myval <- 12

Casi todos los datos simples que se van a usar, serán vectores.

myval <- c(12,21,2)

Para ver el valor, basta con usar print o poner el nombre del valor.

print(myval) 
myval

Los objetos existen en una memoria de sesión que se pueden consultar mediante el uso de ls.

ls ()

Vectores

Para definir un vector de tipo numérico con longitud determinada:

vector ("numeric", length = 23)

A los vectores se les puede asignar valores de inicio, con patrones repetitivos

(rep(c(TRUE,FALSE),10))
 [1]  TRUE FALSE  TRUE FALSE  TRUE FALSE  TRUE FALSE  TRUE FALSE  TRUE FALSE  TRUE FALSE  TRUE FALSE  TRUE FALSE  TRUE
[20] FALSE

También se puede usar un vector para acceder a los valores de dentro del propio vector. En el ejemplo, se imprimirán por pantalla los valores que estén en posiciones múltiplos de 4.

my_vector[c(FALSE,FALSE,FALSE,TRUE)]

Fechas

http://www.stat.berkeley.edu/~s133/dates.html

today <- Sys.Date()

Leer un archivo:

mydata <- read.table("mycommaseparatedvaluefile.csv", header=TRUE, sep=",", fileEncoding = "latin1")
view (Data)

Using linux box to shrink and separate virtual disks

I have some virtual machines with partitions on their vmdk. This makes it terribly difficult to be resized.

I am going to use old dd linux command to copy all data.

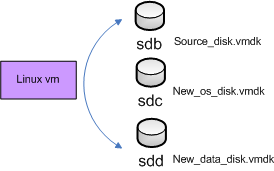
In the hipervisor, I’m using a linux box, actually Debian box, to map all disks, and do all the block writing commands.

vmware_shrink2

I also have to take care of the first blocks of the disks, which contains the booting mark. Otherwise, I will have a copy of my data, but my disk won’t be bootable.

vmware_shrink1

Let’s get started.

I will assign to my linux box, all my disks. Old and new ones.

OS disk: Writing boot sector

#
# Copy boot blocks and old partition tables
#
dd if=/dev/sdb of=/dev/sdc bs=16 count=200

OS disk: writing data

I have to re-do partition table (using fdisk) and then copy all data.

As I copied from the original source disk the first sector, a fake partition table is also writen on my new OS disk. It’s time to repartition.

fdisk /dev/sdc
Welcome to fdisk (util-linux 2.25.2).
Changes will remain in memory only, until you decide to write them.
Be careful before using the write command.
Command (m for help): p
Disk /dev/sdc: 15 GiB, 16106127360 bytes, 31457280 sectors
Units: sectors of 1 * 512 = 512 bytes
Sector size (logical/physical): 512 bytes / 512 bytes
I/O size (minimum/optimal): 512 bytes / 512 bytes
Disklabel type: dos
Disk identifier: 0xfe1387ed
Device Boot Start End Sectors Size Id Type
/dev/sdc1 * 63 31471334 31471272 15G 7 HPFS/NTFS/exFAT
/dev/sdc2 31471335 52452224 20980890 10G 7 HPFS/NTFS/exFAT

Delete second partition

Command (m for help): d 2
(...)
Command (m for help): p
(...)
Device Boot Start End Sectors Size Id Type
/dev/sdc1 * 63 31471334 31471272 15G 7 HPFS/NTFS/exFAT
(...)
Command (m for help): w
The partition table has been altered.
Calling ioctl() to re-read partition table.
Syncing disks.

To write the data, the dd command has to be invoked partitions name (sdb1) and not entire disk (sdb). Entire disk was used just for the boot mark.

dd if=/dev/sdb1 of=/dev/sdc1

Data disk: writing data

I have 2 options here. As it is data, I can either write blocks (dd) or just ordinary file copying.

I created the partition table.

fdisk /dev/sdd

Command (m for help): t
Selected partition 1
Hex code (type L to list all codes): 7
Changed type of partition 'HPFS/NTFS/exFAT' to 'HPFS/NTFS/exFAT'.

Command (m for help): p
Disk /dev/sdd: 10 GiB, 10737418240 bytes, 20971520 sectors
Units: sectors of 1 * 512 = 512 bytes
Sector size (logical/physical): 512 bytes / 512 bytes
I/O size (minimum/optimal): 512 bytes / 512 bytes
Disklabel type: dos
Disk identifier: 0x00c7e39c
Device Boot Start End Sectors Size Id Type
/dev/sdd1 2048 20971519 20969472 10G 7 HPFS/NTFS/exFAT

Command (m for help): w
The partition table has been altered.
Calling ioctl() to re-read partition table.
Syncing disks.

If we are going to use file system operations, I need to give it ntfs format:

apt-get install ntfs-3g
mkfs.ntfs /dev/sdd1

Now, it is time to mount both partitions and copy!

mkdir /mnt/old_data
mkdir /mnt/new_data
mount /dev/sdb2 /mnt/old_data/
mount /dev/sdd1 /mnt/new_data/
cp -rfp /mnt/old_data/* /mnt/new_data/

If ntfs permissions are not correctly written, you can use again old dd:

dd if=/dev/sdb2 of=/dev/sdd1

Puppet: Crear nuevos tipos para recursos

Un recurso (resource) en puppet es la unidad mínima de configuración.  Puppet viene con algunos recursos ya predefinidos (built-in) como son:

Los recursos, a la hora de instanciarse tienen un nombre propio de instancia, y se pueden invocar tantos como sean necesarios.

Es la diferencia más interesante respecto de una clase. La clase se aplica de forma única sobre el servidor; pero la clase puede tener N instancias de un recurso.

Vamos a ver cómo definir los recursos más simples, en el lenguaje declarativo de puppet.

Este ejemplo está sacado de puppetlabs:
# /etc/puppetlabs/puppet/modules/apache/manifests/vhost.pp
define apache::vhost (Integer $port, String[1] $docroot, String[1] $servername = $title, String $vhost_name = '*') {
  include apache # contains Package['httpd'] and Service['httpd']
  include apache::params # contains common config settings
  $vhost_dir = $apache::params::vhost_dir
  file { "${vhost_dir}/${servername}.conf":
    content => template('apache/vhost-default.conf.erb'),
      # This template can access all of the parameters and variables from above.
    owner   => 'www',
    group   => 'www',
    mode    => '644',
    require => Package['httpd'],
    notify  => Service['httpd'],
  }
}


Dado que está parametrizado, se pueden invocar N instancias distintas de vhost en nuestra clase.

Para invocar una instancia, es necesario ponerle un nombre y

<TYPE> { '<TITLE>':
  <ATTRIBUTE> => <VALUE>,
}

El ejemplo básico para el nuestro, sería en un servidor, pasar a definir varios vhosts distintos:

apache::vhost {'homepages':
  port    => 8081, # Becomes the value of $port
  docroot => '/var/www-testhost', # Becomes the value of $docroot
}

apache::vhost {'redmine':
  port    => 80, # Becomes the value of $port
  docroot => '/var/www/redmine', # Becomes the value of $docroot
}
 

Gestión de claves de hosts vmware en esxi 6

Las reglas de complejidad de claves en esxi 6, cambian entre las versiones.

A nivel de archivos en los hosts, se almacena en /etc/pam.d/passwd

Este era el nivel por defecto en esxi 5.5:

password requisite /lib/security/$ISA/pam_passwdqc.so retry=3 min=8,8,8,7,6

El nivel que sale por defecto en esxi6:

password requisite /lib/security/$ISA/pam_passwdqc.so retry=3 min=disabled,disabled,disabled,7,7

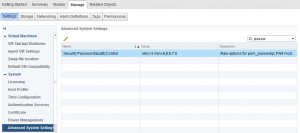
Para hacer cambios, se debe hacer a través del interfaz web. En la versión anterior sí se hacía a través de archivos.

esxi_change_security

Para cambiar de forma descentralizada todas las claves de los hosts, recomiendo usar un script de powercli:

Esta opción no deja log

https://deangrant.wordpress.com/2014/07/15/powercli-changing-esxi-host-root-password/

Mucho más completo, el script de definit.co.uk que exporta un log con el resultado:

http://www.definit.co.uk/2013/06/changing-esxi-root-passwords-the-smart-way-via-powercli/

VMWare 6 VSCA: Monitorización con snmp

En las anteriores versiones de vmware, para hacer una monitorización estándar con snmp, era necesario instalar a través de yast los paquetes de snmp.

https://thwack.solarwinds.com/thread/70271

En la versión 6 hay algunos cambios.

VSCA Snmp en puerto 161

Viene con snmp instalado y corriendo en el puerto 161, pero sólo para envío de traps. No permite hacer llamadas get.

http://pubs.vmware.com/vsphere-60/index.jsp#com.vmware.vsphere.vcsa.doc/GUID-04815BDB-5AF6-4067-A471-28E7F1800C78.html

VSCA Snmp en puerto no estándar

Sin  embargo, se puede poner un segundo servicio de snmp, que sí responde a peticiones Get en cualquier otro puerto:

Command> snmp.set --port 49160
Command> snmp.set --communities mycommunity

Con esto, ya se puede integrar la monitorización en un sistema como nagios.

El precio mínimo de un burofax en unipost

Esto es el precio mínimo real de enviar un burofax mediante unipost


Concepto Cantidad Precio /u. Importe
UniBurofax Básico 1 5,2900 € 5,29 €
Página UniBurofax 2 0,4631 € 0,93 €
Justificante entrega UniBurofax 1 3,4939 € 3,49 €
Copia certificada física UniBurofax 0 7,4541 € 0,00 €
Página C.C. UniBurofax 0 0,1464 € 0,00 €
Aviso servicio online 1 1,4323 € 1,43 €
Copia certificada digital UniBurofax 1 7,4541 € 7,45 €
Base imponible servicio 18,59 €
IVA 3,90 €
Importe total servicio 22,49 €